"Nobody knows what was under the coffee stain, least of all me. But my brushstrokes never stop at the edge of it, so nobody ever asks."
An Overconfident Exemplar Patch
Inpainting is restoration with zero data inside the hole: whatever appears there comes entirely from the prior, so the method's belief about images is not a correction term, it is the whole answer. Smoothness priors continue intensity into the hole, transport priors continue edges, and exemplar priors copy texture from elsewhere in the image. The craft is reading the hole, what structures it interrupts and how wide it is, and choosing the belief that can actually bridge it.
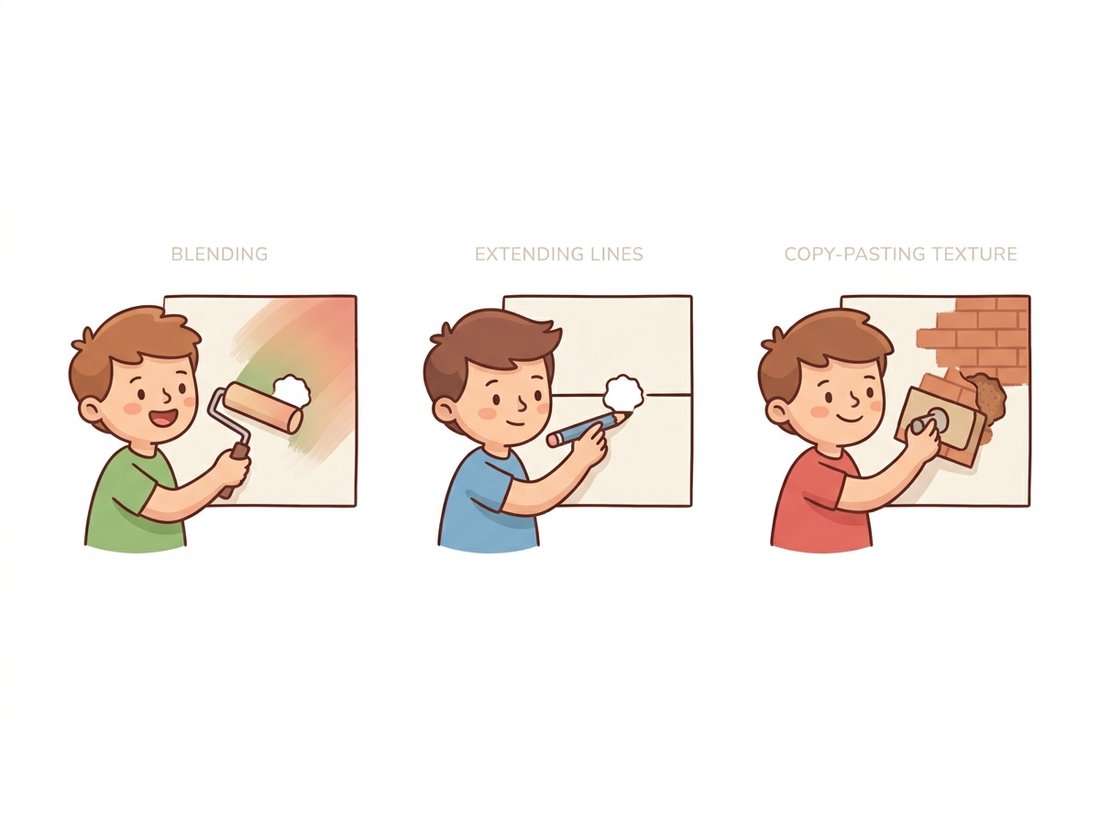
Denoising (Section 7.2) had noisy data at every pixel; deconvolution (Section 7.3) had blurred data at every pixel. Inpainting has no data where it matters: a scratch, a logo, a dust speck, a dead sensor column, or an ex-partner has replaced a region of the image outright. The term comes from art conservation, where restorers fill losses in a painting by extending the surrounding work into the gap, and the algorithmic versions follow the same ethic: the fill must be inferred from what survives, and the seams must not show. As the illustration below suggests, different holes call for different helpers: one smooths, one continues a line, one copies texture.
1. Holes, Masks, and Honest Ground Rules Beginner
Every inpainting algorithm consumes two inputs: the damaged image and a binary mask marking which pixels are missing (in OpenCV's convention, nonzero mask pixels are the hole). The algorithm never touches pixels outside the mask, which means the mask is a contract: anything damaged but unmasked will be treated as gospel truth and propagated into the fill. This makes mask preparation half the job. Masks come from thresholding when the damage has a distinctive color (the methods of Chapter 2), from manual annotation, or, later in the book, from segmentation models. Whatever the source, the standard finishing move is a morphological dilation from Chapter 6: damage almost always bleeds a pixel or two beyond its visible core (JPEG halos around a logo, scattering around a scratch), and an under-mask poisons the fill with contaminated boundary values. Over-masking by two pixels costs almost nothing; under-masking by one ruins the result. Code 7.4.1 manufactures a test case so we can score every method against known truth.
import cv2
import numpy as np
from skimage import data
from skimage.metrics import peak_signal_noise_ratio as psnr

rng = np.random.default_rng(seed=7)
clean = data.camera()                                   # uint8, 512x512

# Synthesize scratch damage: random thin lines, then a fat blotch.
mask = np.zeros_like(clean)
for _ in range(12):
    p1 = tuple(rng.integers(0, 512, 2))
    p2 = tuple(rng.integers(0, 512, 2))
    cv2.line(mask, p1, p2, color=255, thickness=2)
cv2.circle(mask, (300, 180), 22, color=255, thickness=-1)

# Dilate the mask so it overshoots the damage slightly (the safe direction).
mask = cv2.dilate(mask, np.ones((3, 3), np.uint8))

damaged = clean.copy()
damaged[mask > 0] = 255                                 # burn the damage in
print(f"damaged fraction: {(mask > 0).mean():.1%}, "
      f"PSNR of damaged image: {psnr(clean, damaged):.1f} dB")
2. Smoothness: Harmonic and Biharmonic Filling Intermediate
The simplest belief about the missing region is that the image varies smoothly across it. Formally: find the fill that satisfies Laplace's equation $\nabla^2 I = 0$ inside the hole, with the surviving pixels on the boundary as fixed boundary conditions. The physical picture is a soap film or stretched membrane: clamp a rubber sheet to the intensity values around the hole's rim and let it relax; the relaxed surface is the fill. The numerical recipe is equally physical: repeatedly replace every hole pixel with the average of its four neighbors until nothing changes, which is exactly the heat-diffusion iteration, intensity leaking inward from the rim until equilibrium. Code 7.4.2 implements it in a dozen lines.
def diffusion_inpaint(img, mask, n_iter=3000):
    """Fill masked pixels by iterating Laplace's equation (Jacobi steps)."""
    out = img.astype(np.float64)
    hole = mask > 0
    out[hole] = out[~hole].mean()           # neutral initial guess
    for _ in range(n_iter):
        # four-neighbor average everywhere, applied only inside the hole
        avg = (np.roll(out, 1, 0) + np.roll(out, -1, 0) +
               np.roll(out, 1, 1) + np.roll(out, -1, 1)) / 4.0
        out[hole] = avg[hole]
    return np.clip(out, 0, 255).astype(np.uint8)

filled_d = diffusion_inpaint(damaged, mask)
print(f"diffusion inpaint PSNR: {psnr(clean, filled_d):.1f} dB")
On the thin scratches this works almost perfectly: a two-pixel gap in smooth content is bridged invisibly. On the 44-pixel blotch it fails in an instructive way. The membrane is maximally smooth, so the fill is a featureless gradient: no texture, no edges, a soft gray cloud where the wall's brick pattern should continue. Worse, an edge that hits the hole's rim stops dead, because Laplace's equation has no concept of "continue this line." The biharmonic upgrade ($\nabla^4 I = 0$, a stiff plate instead of a floppy membrane) matches boundary gradients as well as values, extending edges a little way into the hole before sagging, and is what scikit-image implements.
skimage.restoration.inpaint_biharmonic and cv2.inpaintBoth libraries reduce this section's algorithms to one call:
from skimage.restoration import inpaint_biharmonic

# Stiff-plate smoothness (best quality among smoothness priors, slowest)
filled_b = inpaint_biharmonic(damaged, mask > 0)

# OpenCV: both classical fast methods, milliseconds each
filled_ns = cv2.inpaint(damaged, mask, inpaintRadius=3, flags=cv2.INPAINT_NS)
filled_te = cv2.inpaint(damaged, mask, inpaintRadius=3, flags=cv2.INPAINT_TELEA)
The 12 lines of Code 7.4.2 (plus the hundreds you would need for biharmonic boundary handling) become 1 line per method. Internally the libraries solve the partial differential equations (PDEs) with proper sparse linear algebra rather than naive Jacobi sweeps, handle color channels jointly, and run orders of magnitude faster; cv2.inpaint processes a 512x512 image in a few milliseconds, fast enough for video.
3. Continuing Structure: Isophotes and Fast Marching Intermediate
The 2000 paper that imported the word "inpainting" into vision (Bertalmio, Sapiro, Caselles, and Ballester) fixed smoothness filling's blindness to edges. Their observation: what a human restorer continues into a gap is not intensity but isophotes, the level curves of constant brightness, which run perpendicular to the gradient, along the direction $\nabla^{\perp} I$. Their PDE transports boundary information into the hole along those curves, so an interrupted edge sails across the gap instead of stopping at the rim. The mathematics turned out to mirror fluid dynamics, with image intensity playing the role of a stream function, which is why OpenCV's implementation flag is cv2.INPAINT_NS, for Navier-Stokes.
Telea's 2004 method, OpenCV's other flag, gets most of the same benefit with much simpler machinery. It fills the hole strictly from the rim inward, like rust eating into metal, processing pixels in order of their distance from the boundary (computed by the fast marching method, a cousin of the distance transforms in Chapter 6). Each pixel is estimated as a weighted average of its already-known neighbors, with weights favoring neighbors whose direction aligns with the advancing front's normal and those closer by, so directional structure is respected without solving any PDE. Figure 7.4.1 lays the three classical strategies side by side; Code 7.4.4 races them on our test case.
candidates = {
    'diffusion (scratch-built)': filled_d,
    'biharmonic (skimage)':      (np.clip(filled_b * 255, 0, 255)
                                  .astype(np.uint8)),
    'navier-stokes (cv2)':       filled_ns,
    'telea (cv2)':               filled_te,
}
for name, img in candidates.items():
    print(f"{name:26s} PSNR = {psnr(clean, img):.1f} dB")
inpaint_biharmonic returns floats in [0, 1] and must be rescaled before comparison with the uint8 original.diffusion (scratch-built) PSNR = 36.2 dB biharmonic (skimage) PSNR = 37.0 dB navier-stokes (cv2) PSNR = 36.6 dB telea (cv2) PSNR = 36.8 dB
For denoising, PSNR against ground truth is a fair score: there is one right answer and the method should approach it. For a large hole there are many right answers; nobody, including the metric, knows which bricks were behind the blotch. A fill can be pixel-wise far from the original yet perfectly convincing, and PSNR actively prefers the blurry "average of all plausible fills" over any single crisp one, the same blur-rewarding bias Section 7.1 warned about, now decisive. The honest evaluation for inpainting is: can an unwarned viewer find the hole? This shift, from fidelity to plausibility, is the conceptual hinge on which restoration swings toward generation, and it is why generative models eventually owned this problem. Carry the thought to Chapter 37, where scoring plausibility becomes a discipline of its own.
4. Copying Texture: Exemplar-Based Inpainting Advanced
PDE and marching methods share a fatal limitation: they synthesize the fill from boundary values, so they can only produce smooth or smoothly streaked content. A hole in a brick wall, a lawn, or a knit sweater needs texture, and the only place texture demonstrably matching this image exists is the image itself, the same self-similarity that powered non-local means in Section 7.2. Exemplar-based inpainting therefore fills holes by copying whole patches from the intact region, as in the right panel of Figure 7.4.1.
The landmark formulation (Criminisi, Perez, and Toyama, 2004) realized that copy order decides everything. Fill the easy flat areas first and interrupted edges get walled off, never to reconnect; the fill looks patched. Their algorithm scores every patch on the hole's rim with a priority $P(p) = C(p) \cdot D(p)$: a confidence term $C$ measuring how much already-known content the patch contains, and a data term $D$ that spikes where a strong isophote hits the boundary head-on. The product makes the algorithm extend structure first, exactly like the transport methods, then flood texture into the remaining areas. One iteration runs four steps: pick the rim patch with the highest priority, search the known region for its best match (masked sum of squared differences over the known pixels only), copy the matching patch's pixels into the unknown ones, then update confidences and repeat until the hole is gone. Structure propagates, then texture; large holes in textured scenes come out looking startlingly intact.
The four steps are worth making precise, because each maps to a few lines of code. Write $\Omega$ for the hole, $\partial\Omega$ for its current boundary (the fill front), and let $C(p)$ be the confidence at a front pixel $p$, initialized to $0$ inside the hole and $1$ on known pixels. For a $w \times w$ patch $\Psi_p$ centered at $p$, the two priority factors are
where $C(p)$ is the fraction of the patch that is already known (so the algorithm fills from the most-surrounded points first, and confidence decays as it pushes deeper into the hole, discouraging the fill from drifting), $\nabla^{\perp} I_p$ is the isophote direction (the level-curve tangent, perpendicular to the gradient), $n_p$ is the unit normal to the front, and $\alpha = 255$ normalizes for 8-bit data. The data term $D(p)$ spikes precisely where a strong edge runs into the front head-on, which is what makes structure propagate first. The source search then minimizes the masked sum of squared differences over the known pixels of the patch, $\Psi_{\hat q} = \arg\min_{\Psi_q \subset \bar\Omega} \sum_{m \in \Psi_p \cap \bar\Omega} \lVert \Psi_p(m) - \Psi_q(m)\rVert^2$, copies the source patch's pixels into the unknown positions of $\Psi_p$, and finally stamps the just-filled pixels with $C(p)$ so their newly-minted confidence flows into the next iteration's priorities. Code 7.4.5 is the whole algorithm; it is longer than the smoothness fillers because priority bookkeeping is the point, but every line traces directly to the four steps above.
import numpy as np
from scipy import ndimage as ndi

def criminisi_inpaint(img, mask, patch=9, alpha=255.0):
    """Exemplar-based inpainting (Criminisi-Perez-Toyama, 2004).

    img : float image, HxW (grayscale) or HxWx3. mask: bool, True = hole.
    Fills the hole by structure-first patch copying. Returns the filled image.
    """
    img = img.astype(np.float64).copy()
    fill = mask.copy()                      # True where still unknown
    conf = (~mask).astype(np.float64)       # confidence: 1 known, 0 hole
    h, w = mask.shape
    r = patch // 2
    # Isophote = gradient rotated 90 deg, taken on a graylevel image.
    gray = img.mean(2) if img.ndim == 3 else img

    while fill.any():
        # 1. Fill front: hole pixels with at least one known 4-neighbor.
        front = fill & (ndi.binary_dilation(~fill) )
        ys, xs = np.nonzero(front)

        # Front normal n_p from the gradient of the (smoothed) fill region.
        ny, nx = np.gradient((~fill).astype(np.float64))
        # Isophote direction = (-dI/dy, dI/dx), i.e. gradient rotated by 90 deg.
        gy, gx = np.gradient(gray)
        iso_y, iso_x = -gx, gy

        # 2. Priorities P = C * D over the front; pick the maximum.
        best_p, best_xy = -1.0, None
        for y, x in zip(ys, xs):
            y0, y1 = max(0, y - r), min(h, y + r + 1)
            x0, x1 = max(0, x - r), min(w, x + r + 1)
            known = ~fill[y0:y1, x0:x1]
            C = conf[y0:y1, x0:x1][known].sum() / known.size
            nlen = np.hypot(nx[y, x], ny[y, x]) + 1e-9
            D = abs(iso_x[y, x] * nx[y, x] + iso_y[y, x] * ny[y, x]) / (nlen * alpha)
            P = C * (D + 1e-3)              # tiny floor so flat fronts still fill
            if P > best_p:
                best_p, best_xy, best_C = P, (y, x), C

        # 3. Best-match search: masked SSD over all fully-known source patches.
        y, x = best_xy
        y0, y1 = max(0, y - r), min(h, y + r + 1)
        x0, x1 = max(0, x - r), min(w, x + r + 1)
        target = img[y0:y1, x0:x1]
        tmask = ~fill[y0:y1, x0:x1]         # known pixels of the target patch
        ph, pw = target.shape[:2]
        best_ssd, best_src = np.inf, None
        for sy in range(0, h - ph + 1):
            for sx in range(0, w - pw + 1):
                if fill[sy:sy + ph, sx:sx + pw].any():
                    continue               # source must be entirely known
                src = img[sy:sy + ph, sx:sx + pw]
                ssd = ((src - target) ** 2)[tmask].sum()   # known pixels only
                if ssd < best_ssd:
                    best_ssd, best_src = ssd, src

        # 4. Copy source pixels into the unknown positions, then update state.
        unknown = fill[y0:y1, x0:x1]
        target[unknown] = best_src[unknown]
        img[y0:y1, x0:x1] = target
        gray = img.mean(2) if img.ndim == 3 else img
        conf[y0:y1, x0:x1][unknown] = best_C
        fill[y0:y1, x0:x1][unknown] = False
    return img
Drop the data term $D$ (fill purely by confidence) and the front advances as a smooth, isotropic peel from the rim inward, exactly like the marching methods, so an edge that should cross the hole gets walled off and the seam shows. Keeping $D$ lets a patch sitting on an incoming isophote leap to the head of the queue and drag the edge across the gap before the surrounding flat texture is filled. This is the whole reason Criminisi beat earlier exemplar methods that filled in raster or onion-peel order: copy order, not patch matching, was the missing idea. Exercise 7.4.2 has you remove and restore $D$ to see the seam appear and vanish.
Code 7.4.5 is faithful but slow: its source search compares the target against every known patch in the image, an $O(\text{image size})$ scan per filled patch. What turned the approach from paper to product was PatchMatch (Barnes et al., 2009), a randomized algorithm that finds approximate nearest-neighbor patches orders of magnitude faster than exhaustive search by exploiting the coherence of natural images: good matches for neighboring patches are themselves neighbors, so after a few random guesses, matches propagate spatially and converge in a handful of passes rather than a full scan. PatchMatch became the engine of Photoshop's Content-Aware Fill in 2010, which is the form in which a billion users met exemplar inpainting without learning its name.
With the mask discipline of Section 1 and the classical fillers of Codes 7.4.1 through 7.4.5, you can build a small portfolio tool that removes an unwanted object from a photo. The pipeline is short: let the user paint a rough mask (or threshold one from a distinctive color), dilate it by a ring of pixels, then route by hole geometry from Table 7.4.1, thin damage to cv2.inpaint with the Telea flag, wider textured holes to the exemplar fill of Code 7.4.5. Wrap it in a tiny script or notebook that takes an image plus a mask and returns the cleaned result. This is a beginner-friendly build (about 30 to 60 minutes), it produces a before-and-after pair that reads instantly in a portfolio, and it is the honest, deterministic cousin of the generative erasers you will build in Chapter 35. Stretch goal: log which method each region was routed to, so the tool can explain its own decisions.
5. Choosing by Hole Geometry Beginner
With three families in hand, selection becomes a matter of reading the hole: what does it interrupt, and how wide is it relative to the structures it cuts? Table 7.4.1 condenses the decision into the form it takes in practice.
| Hole | Typical source | Best classical method | Why |
|---|---|---|---|
| Thin lines (1-5 px) | scratches, wires, hairs, text overlays | Telea or Navier-Stokes | boundary information bridges the gap before it can drift |
| Small blobs in smooth areas | dust, dead pixels, watermarks on sky | biharmonic | smoothness is the truth here, and gradients are matched |
| Medium holes in texture | object removal in grass, fabric, brick | exemplar (Criminisi / PatchMatch) | only copying can manufacture believable texture |
| Large holes crossing structures | removing a person, a car, a building | none of the above | requires semantic invention: the generative methods of Chapter 35 |
Who: The digitization lead at a regional newspaper archive.
Situation: Forty thousand press negatives from 1935 to 1980, being scanned for a public history portal. Decades of handling left fine scratches on nearly every frame, plus mold spots on a few thousand.
Problem: Manual retouching averaged eleven minutes per image; the grant budget covered a summer, not a decade. An intern's first automated attempt ran biharmonic inpainting with masks thresholded from the scans' infrared channel, and it erased scratches beautifully while leaving telltale soft smudges across faces and architectural detail, exactly where mold spots were wide.
Decision: Triage by mask geometry, computed with the shape statistics of Chapter 6: masks under 4 pixels wide (98 percent of all damage) went to cv2.inpaint with the Telea flag, dilated by one pixel; wider mold spots were routed to an exemplar-based fill, and the few hundred frames where holes crossed faces went to the lone human retoucher.
Result: Throughput reached 9 seconds per frame on the automated path. Public-facing spot checks found no complaints about visible repairs; the human queue finished within the summer.
Lesson: Inpainting at scale is a routing problem. Classify each hole, send it to the cheapest method that can plausibly bridge it, and reserve humans (or, today, generative models) for the holes that interrupt meaning rather than texture.
6. From Copying to Imagining Intermediate
Every method in this section is bounded by the same wall: the fill can only contain what the surviving image already shows. Smoothness methods extrapolate intensity, exemplar methods recombine existing patches, but none can reason that the missing region behind a removed person probably contained the continuation of a doorway, because "doorway" is not a concept any of them possess. Crossing that wall requires a model of what the world looks like, learned from millions of images rather than borrowed from one, and that is precisely the road the book travels: segmentation models in Chapter 24 will generate the masks automatically, and the generative inpainters of Chapter 35 will fill them with invented, semantically coherent content. When you get there, notice how much survives: masks still get dilated, fill order still matters (diffusion models fill coarse to fine), and the plausibility-over-fidelity principle of this section becomes the entire evaluation story.
The bridge from this section to modern practice has three spans. LaMa (Suvorov et al., WACV 2022) showed that fast Fourier convolutions, giving every layer the image-wide receptive field that exemplar search always had, let a feed-forward network fill very large holes; it remains a production workhorse because it is deterministic and cheap. RePaint (Lugmayr et al., CVPR 2022) demonstrated that an unmodified diffusion model can inpaint by repeatedly renoising and resampling the hole while clamping the known pixels, pure Bayesian conditioning with no retraining. The 2024 wave made diffusion inpainting controllable and product-grade: BrushNet (Ju et al., ECCV 2024) adds a dedicated branch that injects masked-image features into a frozen diffusion backbone, and PowerPaint (Zhuang et al., ECCV 2024) uses learnable task prompts so one model handles object removal, insertion, and outpainting. Commercial tools like Photoshop's Generative Fill put this in everyone's hands, which sharpened the forensic question this chapter keeps returning to: a Telea fill provably contains only local boundary information, while a generative fill contains a model's opinion, and the difference decides what counts as evidence.
The most-viewed inpainting results in history are weather forecasts. The smooth, gap-free radar and satellite maps on the evening news are routinely inpainted: ground radar has cone-of-silence holes directly above each station and terrain shadows behind mountains, and the filling is done by methods directly descended from the diffusion and transport algorithms of this section, applied to precipitation fields instead of photographs. Millions of people see PDE inpainting every night and call it the weather.
For each task, choose a method from Table 7.4.1 and defend the choice in one sentence by naming what the hole interrupts: (a) removing timestamp text burned into the corner of dashcam footage; (b) erasing a power line crossing a sunset sky; (c) removing a parked car that occludes a hedge and part of a brick wall; (d) repairing a dead 1x512 sensor column in thousands of microscope images; (e) deleting a photobombing stranger standing in front of a crowded bookshelf.
Start from Code 7.4.5 and make one change: comment out the data term $D$ so the priority is confidence alone, $P(p) = C(p)$. Run both versions (with and without $D$) on a 9x9-patch scale against a texture image carrying a strong edge (try skimage.data.grass() with a dark bar painted across it) under a 60x60 hole, and compare visually against cv2.inpaint with the Telea flag. Identify the example where the fill order visibly changes the result: the confidence-only version should wall off the edge while the full priority carries it across, exactly as the "Why the Priority Term Earns Its Keep" note predicts. Then replace the exhaustive source search with a coarse candidate grid (every $k$-th pixel) and report the speed-versus-quality tradeoff, which is the gap PatchMatch closes.
Cut a 80x80 hole from a textured region of an image. Fill it with (a) biharmonic inpainting and (b) your exemplar inpainter from Exercise 7.4.2. Compute PSNR and SSIM for both against the original, then show both crops to three people and ask which repair they can spot. Report the (likely) disagreement between metric and humans, and explain it using the Key Insight callout: what exactly is PSNR averaging over, and why does that favor the blurry fill?